%20--%3e%3cdefs%3e%3cstyle%3e%20.st0%20{%20fill:%20%23061b40;%20}%20.st1%20{%20fill:%20%23306af1;%20}%20.st2%20{%20fill:%20%235ce5cf;%20}%20%3c/style%3e%3c/defs%3e%3cg%3e%3cpath%20class='st0'%20d='M55,10.5h9v3h-9v9h12V7.5h-12v3ZM64,19.5h-6v-3h6v3Z'/%3e%3cpolygon%20class='st0'%20points='69%2016.5%2078%2016.5%2078%2019.5%2069%2019.5%2069%2022.5%2081%2022.5%2081%2013.5%2072%2013.5%2072%2010.5%2081%2010.5%2081%207.5%2069%207.5%2069%2016.5'/%3e%3cpolygon%20class='st0'%20points='95%2010.5%2095%207.5%2083%207.5%2083%2022.5%2095%2022.5%2095%2019.5%2086%2019.5%2086%2016.5%2095%2016.5%2095%2013.5%2086%2013.5%2086%2010.5%2095%2010.5'/%3e%3cpath%20class='st0'%20d='M40,1.5v21h11.6l1.4-1.4v-7.6h0c0,0-1.4-1.5-1.4-1.5l1.4-1.4V2.9l-1.4-1.4h-11.6ZM50,19.5h-7v-6h7v6ZM50,10.5h-7v-6h7v6Z'/%3e%3c/g%3e%3cpath%20class='st1'%20d='M23.1,24L14.7,4.8l-4.9,11.2h3.8l-1.8,4H3.3L12.1,0H2C.9,0,0,.9,0,2v20c0,1.1.9,2,2,2h21.1Z'/%3e%3cpath%20class='st2'%20d='M34,0h-16.8l10.6,24h6.2c1.1,0,2-.9,2-2V2C36,.9,35.1,0,34,0ZM32.5,20h-4V4h4v16Z'/%3e%3c/svg%3e)

Comfyui IC Light
Overview :
ComfyUI-IC-Light is a native plugin for ComfyUI, dedicated to implementing the IC-Light technology. This technology allows users to create backgrounds and re-lighting through a series of workflows, thereby enhancing the visual effects of images. Its significance lies in delivering more natural and realistic image processing results, particularly suitable for users requiring advanced image editing capabilities.
Target Users :
["Professional Image Editing: Offering advanced image processing features to meet professional requirements","Designers: Enhancing the visual appeal of design works","Developers: Integratable into custom image processing applications"]
Use Cases
Using a given foreground image to generate a background and re-lighting
Applying IC-Light technology in design projects to enhance visual expression
Integrating into custom development applications to provide image processing services
Features
Download and extract into the custom_nodes folder in the ComfyUI installation directory
Clone the plugin to the ComfyUI installation directory via GIT
Supports downloading the IC-Light main repository model using ldm format keys
Requires ComfyUI-layerdiffuse node for proper loading of weights
Recommended to use ComfyUI-KJNodes and ComfyUI-Easy-Use node packages for enhanced functionality
Provides various workflows, such as generating backgrounds and re-lighting for given foregrounds
Supports downloading specific models from huggingface
How to Use
Step 1: Download the ComfyUI-IC-Light plugin and extract it to the custom_nodes folder of the ComfyUI installation directory
%20--%3e%3cdefs%3e%3cstyle%3e%20.st0%20{%20fill:%20%230080ff;%20}%20%3c/style%3e%3c/defs%3e%3cpath%20class='st0'%20d='M16.2,11.1c.4.5.4,1.2,0,1.8l-4.7,7.1h-3.8l5.3-8L7.6,4h3.8l4.7,7.1Z'/%3e%3c/svg%3e)
Step 2: Clone the plugin to the ComfyUI installation directory using the GIT command
Step 3: Download the required IC-Light models from huggingface and place them in the specified directory
Step 4: Ensure that the ComfyUI-layerdiffuse node is installed and properly configured
Step 5: Select the recommended node packages as needed to expand functionality
Step 6: Choose the appropriate workflow to begin image processing
Step 7: Follow the instructions of the workflow to generate the desired image effects


Featured AI Tools

Remini
Remini is an online, real-time photo enhancement app that uses world-leading AI technology to transform low-resolution, blurry, pixelated, outdated, and damaged photos into high-quality, crisp, sharp images. Remini also offers more AI-powered image processing features, such as portrait enhancement, painting effects, and blink effects.
AI image enhancement
1.7M
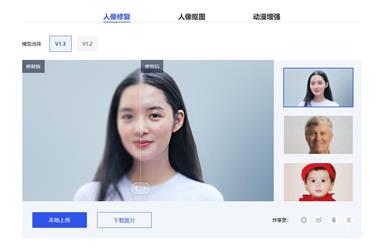
ARC Image Enhancer
ARC Image Enhancer is an image processing tool provided by Tencent AI. It includes portrait restoration, portrait cutout, and anime enhancement features. It can effectively improve the quality and aesthetics of images and can be used in scenarios such as repairing old photos or removing backgrounds from photos.
AI image enhancement
1.7M