%20--%3e%3cdefs%3e%3cstyle%3e%20.st0%20{%20fill:%20%23061b40;%20}%20.st1%20{%20fill:%20%23306af1;%20}%20.st2%20{%20fill:%20%235ce5cf;%20}%20%3c/style%3e%3c/defs%3e%3cg%3e%3cpath%20class='st0'%20d='M55,10.5h9v3h-9v9h12V7.5h-12v3ZM64,19.5h-6v-3h6v3Z'/%3e%3cpolygon%20class='st0'%20points='69%2016.5%2078%2016.5%2078%2019.5%2069%2019.5%2069%2022.5%2081%2022.5%2081%2013.5%2072%2013.5%2072%2010.5%2081%2010.5%2081%207.5%2069%207.5%2069%2016.5'/%3e%3cpolygon%20class='st0'%20points='95%2010.5%2095%207.5%2083%207.5%2083%2022.5%2095%2022.5%2095%2019.5%2086%2019.5%2086%2016.5%2095%2016.5%2095%2013.5%2086%2013.5%2086%2010.5%2095%2010.5'/%3e%3cpath%20class='st0'%20d='M40,1.5v21h11.6l1.4-1.4v-7.6h0c0,0-1.4-1.5-1.4-1.5l1.4-1.4V2.9l-1.4-1.4h-11.6ZM50,19.5h-7v-6h7v6ZM50,10.5h-7v-6h7v6Z'/%3e%3c/g%3e%3cpath%20class='st1'%20d='M23.1,24L14.7,4.8l-4.9,11.2h3.8l-1.8,4H3.3L12.1,0H2C.9,0,0,.9,0,2v20c0,1.1.9,2,2,2h21.1Z'/%3e%3cpath%20class='st2'%20d='M34,0h-16.8l10.6,24h6.2c1.1,0,2-.9,2-2V2C36,.9,35.1,0,34,0ZM32.5,20h-4V4h4v16Z'/%3e%3c/svg%3e)

Hivechat
Overview :
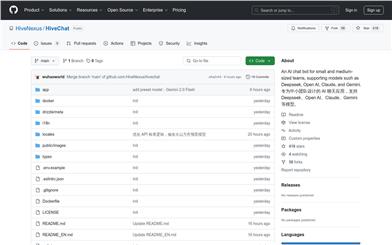
HiveChat is an AI chat application tailored for small to medium-sized teams, offering support for various mainstream AI models like Deepseek, OpenAI, Claude, and Gemini. Its core functionality is to provide teams with an efficient and flexible AI interaction experience, supporting LaTeX and Markdown rendering, image understanding, and AI agents. With administrator configuration, it enables seamless usage across the entire team, making it suitable for companies, schools, organizations, and other small teams. Its technical stack includes Next.js, Tailwindcss, Auth.js, and PostgreSQL. It supports local deployment, Docker deployment, and Vercel deployment, offering high flexibility and scalability.
Target Users :
HiveChat is ideal for small to medium-sized teams, especially those requiring efficient AI interaction, technical support, and flexible deployment. Its multi-model support and user-friendly management dashboard make it a perfect choice for team collaboration and project management.
Use Cases
Online Demo: https://chat.yotuku.cn/, users can register and experience it themselves.
Administrator Demo: https://hivechat-demo.vercel.app/, administrators can configure AI models and service providers.
Supports local deployment, Docker deployment, and Vercel deployment, meeting the needs of different environments.
Features
Supports multiple AI models such as Deepseek, OpenAI, Claude, and Gemini, catering to different team needs.
Provides LaTeX and Markdown rendering capabilities, facilitating use for academic and technical teams.
Features image understanding capabilities, enabling processing of image-related AI tasks.
Equipped with AI agent functionality to enhance interaction efficiency.
Supports cloud data storage, ensuring data security and convenient access.
How to Use
1. Clone the project locally: `git clone https://github.com/HiveNexus/hivechat.git`
%20--%3e%3cdefs%3e%3cstyle%3e%20.st0%20{%20fill:%20%230080ff;%20}%20%3c/style%3e%3c/defs%3e%3cpath%20class='st0'%20d='M16.2,11.1c.4.5.4,1.2,0,1.8l-4.7,7.1h-3.8l5.3-8L7.6,4h3.8l4.7,7.1Z'/%3e%3c/svg%3e)
2. Install dependencies: `cd hivechat && npm install`
3. Modify the configuration file: Copy `.env.example` to `.env` and modify the relevant settings.
4. Initialize the database: `npm run initdb`
5. Start the application: `npm run dev` (development mode) or `npm run build && npm run start` (production mode)
6. Initialize the administrator account: Visit `http://localhost:3000/setup` to complete the administrator account setup.
Featured AI Tools
Hivechat
HiveChat is an AI chat application tailored for small to medium-sized teams, offering support for various mainstream AI models like Deepseek, OpenAI, Claude, and Gemini. Its core functionality is to provide teams with an efficient and flexible AI interaction experience, supporting LaTeX and Markdown rendering, image understanding, and AI agents. With administrator configuration, it enables seamless usage across the entire team, making it suitable for companies, schools, organizations, and other small teams. Its technical stack includes Next.js, Tailwindcss, Auth.js, and PostgreSQL. It supports local deployment, Docker deployment, and Vercel deployment, offering high flexibility and scalability.
Social Networking Tools
56.0K
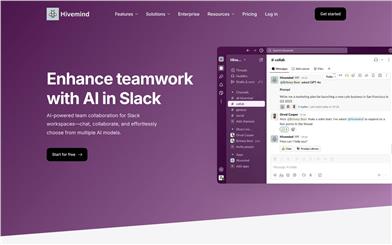
Hivemind
Hivemind is an AI team collaboration tool dedicated to accelerating team innovation and efficiency. It provides multiple AI models to help users seamlessly integrate advanced AI features into their daily workflows. Key advantages of Hivemind include flexible AI model selection, real-time chat functionality, privacy protection, and flexible pricing plans.
Team Collaboration Tools
39.2K