%20--%3e%3cdefs%3e%3cstyle%3e%20.st0%20{%20fill:%20%23061b40;%20}%20.st1%20{%20fill:%20%23306af1;%20}%20.st2%20{%20fill:%20%235ce5cf;%20}%20%3c/style%3e%3c/defs%3e%3cg%3e%3cpath%20class='st0'%20d='M55,10.5h9v3h-9v9h12V7.5h-12v3ZM64,19.5h-6v-3h6v3Z'/%3e%3cpolygon%20class='st0'%20points='69%2016.5%2078%2016.5%2078%2019.5%2069%2019.5%2069%2022.5%2081%2022.5%2081%2013.5%2072%2013.5%2072%2010.5%2081%2010.5%2081%207.5%2069%207.5%2069%2016.5'/%3e%3cpolygon%20class='st0'%20points='95%2010.5%2095%207.5%2083%207.5%2083%2022.5%2095%2022.5%2095%2019.5%2086%2019.5%2086%2016.5%2095%2016.5%2095%2013.5%2086%2013.5%2086%2010.5%2095%2010.5'/%3e%3cpath%20class='st0'%20d='M40,1.5v21h11.6l1.4-1.4v-7.6h0c0,0-1.4-1.5-1.4-1.5l1.4-1.4V2.9l-1.4-1.4h-11.6ZM50,19.5h-7v-6h7v6ZM50,10.5h-7v-6h7v6Z'/%3e%3c/g%3e%3cpath%20class='st1'%20d='M23.1,24L14.7,4.8l-4.9,11.2h3.8l-1.8,4H3.3L12.1,0H2C.9,0,0,.9,0,2v20c0,1.1.9,2,2,2h21.1Z'/%3e%3cpath%20class='st2'%20d='M34,0h-16.8l10.6,24h6.2c1.1,0,2-.9,2-2V2C36,.9,35.1,0,34,0ZM32.5,20h-4V4h4v16Z'/%3e%3c/svg%3e)

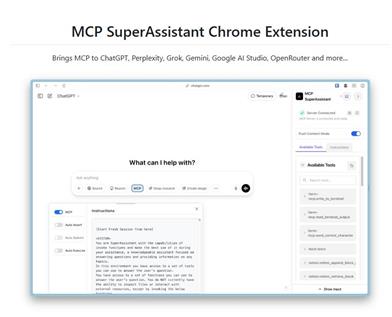
Open MCP Client
Overview :
open-mcp-client is an open-source project aimed at providing client support for Multi-Cloud Platform (MCP). It integrates LangGraph agent and a CopilotKit-based frontend application, supporting interaction with the MCP server and tool invocation. The project is developed using TypeScript, CSS, Python, and JavaScript, emphasizing development efficiency and user experience. It is suitable for developers and enterprises for managing and interacting with multi-cloud resources. Open-source and free, it's ideal for users who want to rapidly develop and deploy in multi-cloud environments.
Target Users :
This product is suitable for developers and enterprise users, especially teams that need to manage resources and invoke tools in multi-cloud environments. It provides a flexible development framework that supports rapid development and deployment, suitable for users who want to improve development efficiency and user experience.
Use Cases
Developers can use the LangGraph agent to connect to the MCP server and invoke tools to achieve automated tasks.
Enterprise users can manage multi-cloud resources through the frontend application, improving resource management efficiency.
Developers can quickly start the development environment locally to develop and debug frontend and agent services.
Features
Supports LangGraph agent, connecting to the MCP server and invoking tools.
Provides a CopilotKit-based frontend application for UI and state synchronization.
Supports multi-language environment variable configuration for flexible deployment.
Provides independent frontend and agent services for easy debugging and development.
Supports quick local startup of the development environment for rapid iteration.
How to Use
1. Set environment variables: Create a .env file in the project root directory and add LANGSMITH_API_KEY.
%20--%3e%3cdefs%3e%3cstyle%3e%20.st0%20{%20fill:%20%230080ff;%20}%20%3c/style%3e%3c/defs%3e%3cpath%20class='st0'%20d='M16.2,11.1c.4.5.4,1.2,0,1.8l-4.7,7.1h-3.8l5.3-8L7.6,4h3.8l4.7,7.1Z'/%3e%3c/svg%3e)
2. Create a .env file in the agent directory and add OPENAI_API_KEY and LANGSMITH_API_KEY.
3. Start the development environment: Run pnpm run dev-frontend and pnpm run dev-agent in the terminal to start the frontend and agent services respectively.
4. Access http://localhost:3000 to view the application in your browser.
5. Develop and debug as needed, adjust configurations, or add new features.


Featured AI Tools
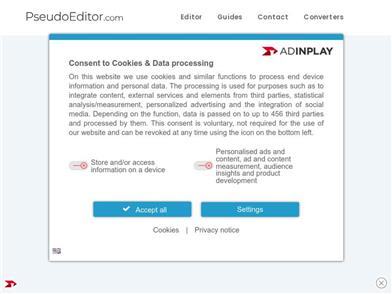
Pseudoeditor
PseudoEditor is a free online pseudocode editor. It features syntax highlighting and auto-completion, making it easier for you to write pseudocode. You can also use our pseudocode compiler feature to test your code. No download is required, start using it immediately.
Development & Tools
3.8M
Coze
Coze is a next-generation AI chatbot building platform that enables the rapid creation, debugging, and optimization of AI chatbot applications. Users can quickly build bots without writing code and deploy them across multiple platforms. Coze also offers a rich set of plugins that can extend the capabilities of bots, allowing them to interact with data, turn ideas into bot skills, equip bots with long-term memory, and enable bots to initiate conversations.
Development & Tools
3.8M