%20--%3e%3cdefs%3e%3cstyle%3e%20.st0%20{%20fill:%20%23061b40;%20}%20.st1%20{%20fill:%20%23306af1;%20}%20.st2%20{%20fill:%20%235ce5cf;%20}%20%3c/style%3e%3c/defs%3e%3cg%3e%3cpath%20class='st0'%20d='M55,10.5h9v3h-9v9h12V7.5h-12v3ZM64,19.5h-6v-3h6v3Z'/%3e%3cpolygon%20class='st0'%20points='69%2016.5%2078%2016.5%2078%2019.5%2069%2019.5%2069%2022.5%2081%2022.5%2081%2013.5%2072%2013.5%2072%2010.5%2081%2010.5%2081%207.5%2069%207.5%2069%2016.5'/%3e%3cpolygon%20class='st0'%20points='95%2010.5%2095%207.5%2083%207.5%2083%2022.5%2095%2022.5%2095%2019.5%2086%2019.5%2086%2016.5%2095%2016.5%2095%2013.5%2086%2013.5%2086%2010.5%2095%2010.5'/%3e%3cpath%20class='st0'%20d='M40,1.5v21h11.6l1.4-1.4v-7.6h0c0,0-1.4-1.5-1.4-1.5l1.4-1.4V2.9l-1.4-1.4h-11.6ZM50,19.5h-7v-6h7v6ZM50,10.5h-7v-6h7v6Z'/%3e%3c/g%3e%3cpath%20class='st1'%20d='M23.1,24L14.7,4.8l-4.9,11.2h3.8l-1.8,4H3.3L12.1,0H2C.9,0,0,.9,0,2v20c0,1.1.9,2,2,2h21.1Z'/%3e%3cpath%20class='st2'%20d='M34,0h-16.8l10.6,24h6.2c1.1,0,2-.9,2-2V2C36,.9,35.1,0,34,0ZM32.5,20h-4V4h4v16Z'/%3e%3c/svg%3e)

Prime
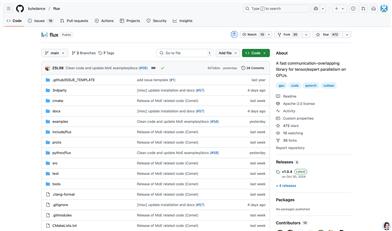
Overview :
PrimeIntellect-ai/prime is a framework designed for efficient, globally distributed training of AI models over the internet. Through technological innovation, it facilitates cross-regional AI model training, improves computing resource utilization, and reduces training costs, which is critical for AI research and application development that requires significant computational resources.
Target Users :
The target audience includes AI researchers and developers, particularly those requiring large-scale distributed model training. This framework enhances the efficiency of the distributed training process, making it well-suited for scenarios that involve handling large datasets and complex models.
Use Cases
Used for training large-scale language models like BERT or GPT.
In medical image analysis, employed for training deep learning models across multiple data centers.
In finance, utilized for globally distributed training of risk assessment models.
Features
ElasticDeviceMesh: Supports fault-tolerant training and dynamically manages global process groups.
Asynchronous distributed checkpoints: Reduces model saving time and enhances compute utilization.
Real-time checkpoint recovery: Allows nodes to join mid-training and quickly acquire model state.
Custom Int8 All-Reduce Kernel: Minimizes communication load and improves bandwidth utilization.
Maximized bandwidth utilization: Enhances network bandwidth utilization through sharding techniques.
PyTorch FSDP2 / DTensor ZeRO-3 implementation: Supports sharding of model weights, gradients, and optimizer states.
CPU Off-Loading: Offloads all tensors required by the Diloco optimizer to CPU memory to alleviate GPU load.
How to Use
1. Clone the repository: Use the git clone command to clone the PrimeIntellect-ai/prime project to your local machine.
%20--%3e%3cdefs%3e%3cstyle%3e%20.st0%20{%20fill:%20%230080ff;%20}%20%3c/style%3e%3c/defs%3e%3cpath%20class='st0'%20d='M16.2,11.1c.4.5.4,1.2,0,1.8l-4.7,7.1h-3.8l5.3-8L7.6,4h3.8l4.7,7.1Z'/%3e%3c/svg%3e)
2. Install uv: Follow the instructions provided on the project page to install the uv tool.
3. Set up the environment: Install the iperf tool, create a virtual environment, activate it, and synchronize dependencies.
4. Log into Hugging Face: Use the huggingface-cli command to log into the Hugging Face platform.
5. Run tests: Use the provided commands to run tests and verify the setup is correct.
6. Run DiLoCo: Use the helper script to locally test DiLoCo.
7. Run the full test suite: Ensure that at least two GPUs are available, then run the pytest command.
8. Export checkpoints: Use the provided export_dcp.py script to convert the checkpoints saved by the training script into Hugging Face compatible models.


Featured AI Tools
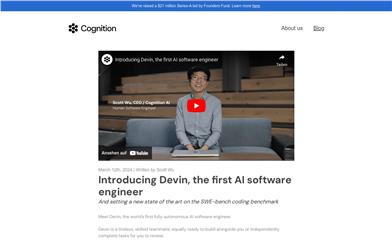
Devin
Devin is the world's first fully autonomous AI software engineer. With long-term reasoning and planning capabilities, Devin can execute complex engineering tasks and collaborate with users in real time. It empowers engineers to focus on more engaging problems and helps engineering teams achieve greater objectives.
Development and Tools
1.7M
Chinese Picks

Foxkit GPT AI Creation System
FoxKit GPT AI Creation System is a completely open-source system that supports independent secondary development. The system framework is developed using ThinkPHP6 + Vue-admin and provides application ends such as WeChat mini-programs, mobile H5, PC website, and official accounts. Sora video generation interface has been reserved. The system provides detailed installation and deployment documents, parameter configuration documents, and one free setup service.
Development and Tools
753.2K